Contents
Chapter 02
Dashboard
The loan agreement you sign is what governs your loan. This guide explains how to use the website; where the two ever differ, your signed agreement prevails.
The Dashboard is the first page after you log in, and the one page worth checking if you only check one. Anything we need from you appears here.
Section 01
Getting around
The menu down the left side has five entries:
| Menu | Chapter |
|---|---|
| Dashboard | this one |
| New application | 4 |
| My Applications | 3 |
| Repayment | 8 |
| Support | 10 |
My account is not in the menu: press your name at the very bottom of the menu. It is one page with your details, your phone number and email, and your password (chapters 5 and 6).
On a phone the menu is folded away — press the menu button at the top left to open it.
Below the menu is User guide, which opens this guide in a new tab. Under that you can switch language and switch between light and dark display. Your language choice is remembered for next time. The company logo at the top of the menu takes you back to the public website; Log out is the button beside your name at the very bottom.
The bar across the top of every page also has a New application button — the same as the menu entry, and not shown while you are already on the application form.
Section 02
The three cards at the top
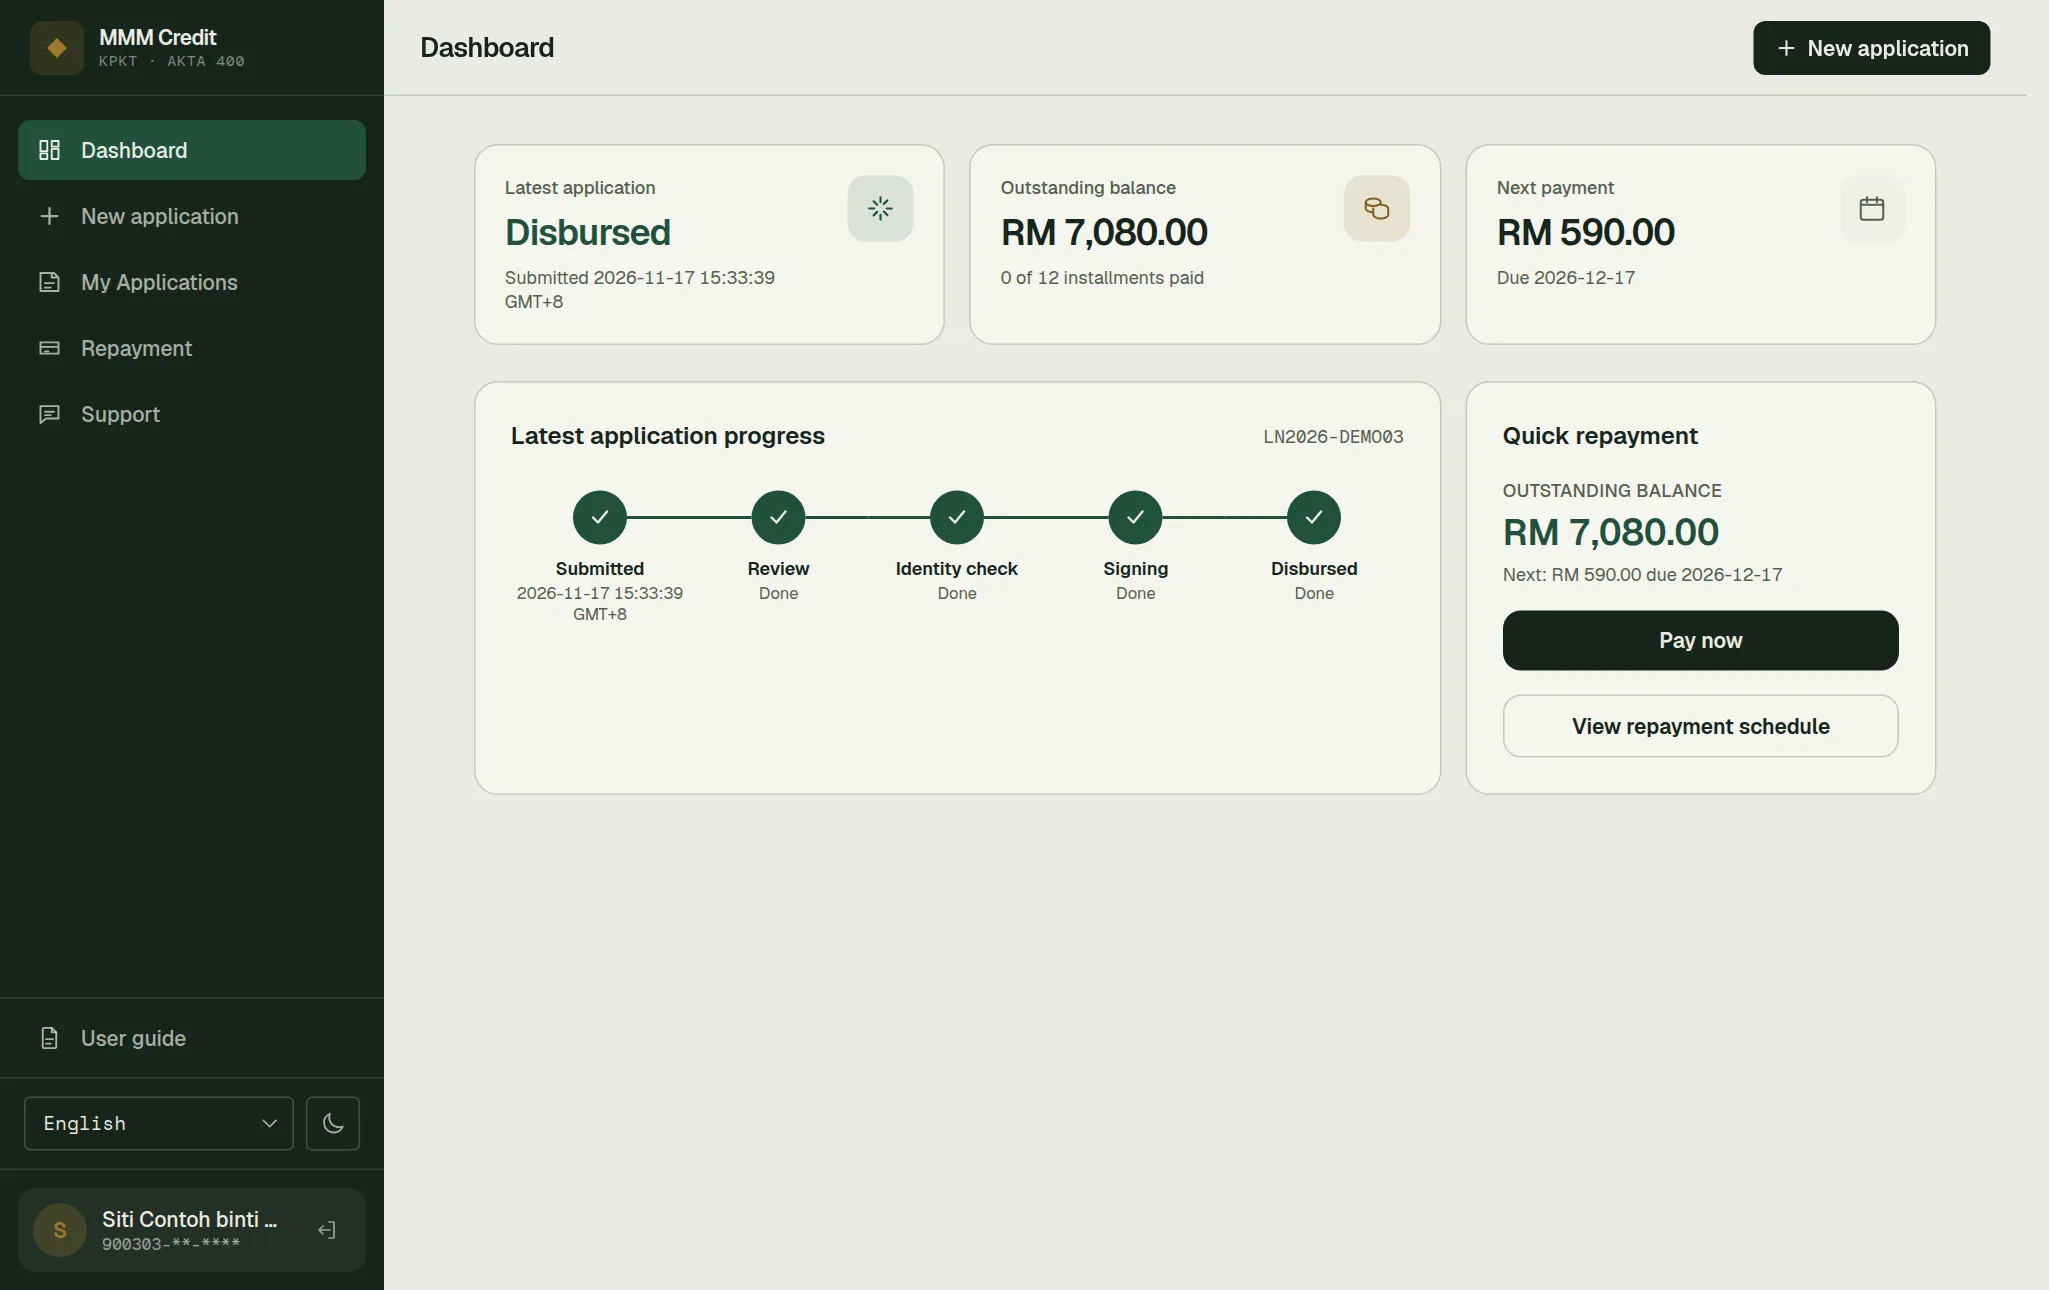
Latest application — the status of your most recent application, and the date you submitted it. The colour is meaningful: green means it is moving along, amber means we are waiting for you, red means it was not approved. While your loan agreement is being signed it reads Agreement: waiting for signatures, in amber — and it stays that way after you have signed, until the company and the witness have signed too.
Outstanding balance — what is still owed on your current loan, and how many instalments you have paid. Before your loan is disbursed, this shows a dash — that is normal, not an error. If you are repaying more than one loan, it is the total for all of them, with "Across {count} loans" underneath.
Next payment — the amount and date of your next instalment. Also a dash until your loan is disbursed. If more than one loan falls due on that date, the amount is their total and the line underneath reads "Due {date} · {count} loans".
Section 03
Finish setting up your account
Registering verifies your email address, so most people never see this. It appears only if your email address is not verified — for example because our staff created your account for you, or you registered before the registration page verified email addresses — and you have not applied for anything yet. The middle of the dashboard then shows a short checklist instead:
- Phone number verified — shown as already done.
- Verify your email address — press Verify email. The form opens right there on the dashboard; we send a code to your email address and you type it in. If your account has no email address yet (for example, if our staff created it for you), this line reads Add and verify an email address and the button is Add email.
The checklist is there because you cannot submit a loan application until your email address is verified, and it is far better to find that out here than after filling in six pages of forms.
Once it is complete, this space turns into the Apply for a loan button.
Section 04
Your application's progress
Once you have applied, the middle of the dashboard shows the five-step progress bar described in chapter 0, with your application's reference number in the corner. Quote that reference number when you open a ticket under Support.
A tick means the step is done. The highlighted step is the one happening now. If your application is closed or was not approved, the bar is replaced by a single line saying so.
When we need something from you
"Identity check needed" — a panel with a Start now button. See chapter 7.
"Waiting for you: sign your loan agreement" — once your loan agreement is ready, a panel appears with a Sign agreement button, which takes you to the signing page. See chapter 11.
Section 05
Send the documents we asked for
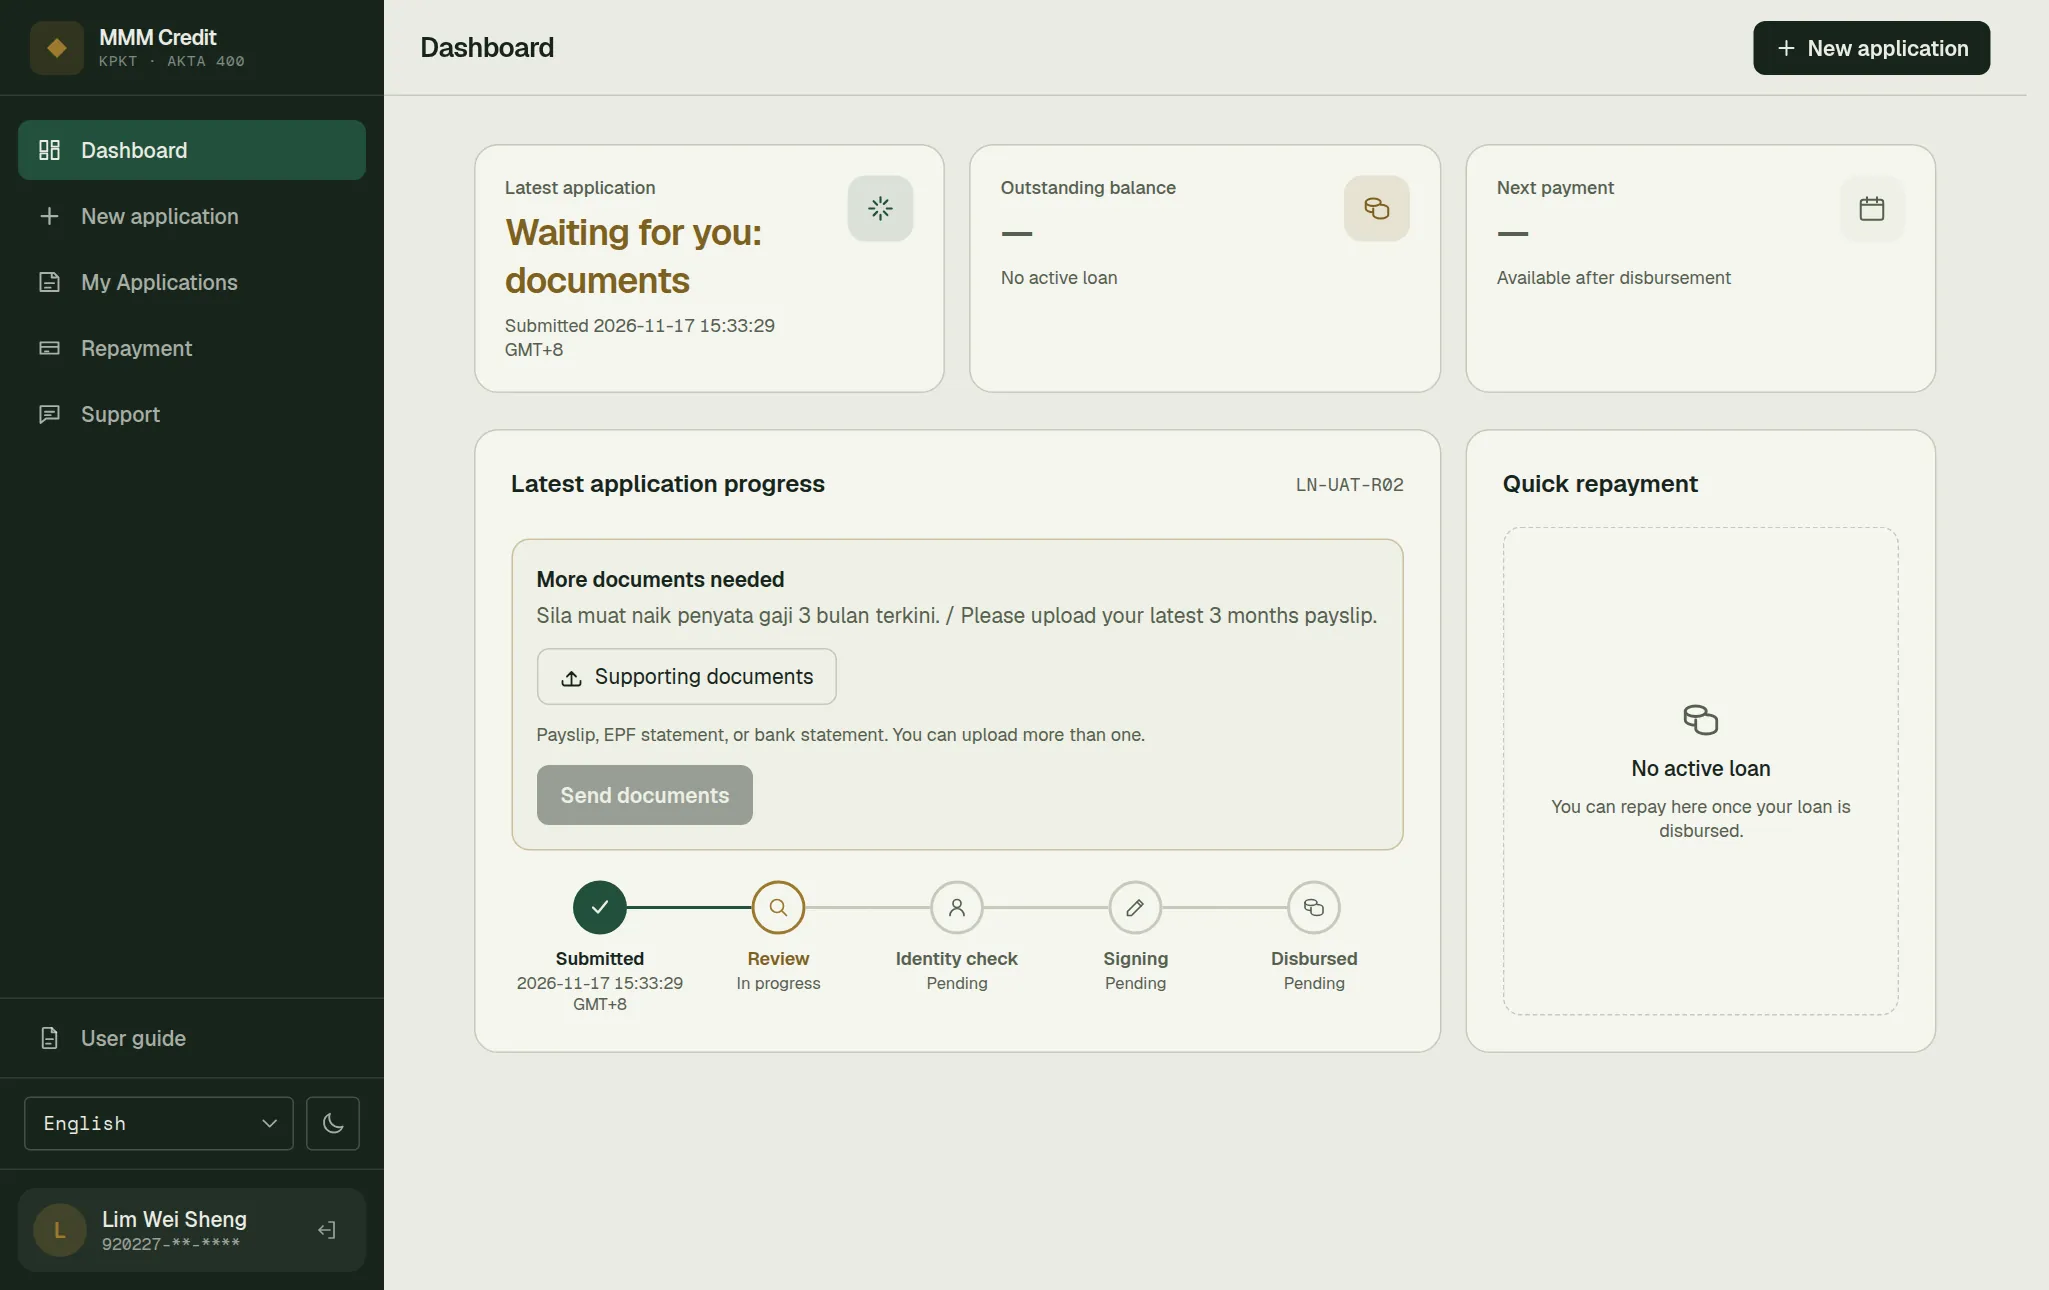
When a reviewer needs something more, a "More documents needed" panel appears on the dashboard with the reviewer's own words explaining what is missing.
Read the reviewer's note
it says what is missing (a payslip, an EPF statement, bank statements…).
Choose the files
press Supporting documents to choose one or more files (JPG, PNG or PDF). The names you picked are listed underneath so you can see what is about to go.
Send them
press Send documents. It stays unavailable until you have chosen at least one file. Your application goes straight back into review; you do not need to do anything else.
Section 06
Quick repayment
The Quick repayment panel on the right shows your outstanding balance and next payment, with two buttons: Pay now and View repayment schedule. Both take you to the Repayment page, which shows, loan by loan, whether it can be paid online — see chapter 8. Before you have a loan the panel says so plainly.
Still stuck?
Talk to us.
Use the Contact Us form. If you have an account, log in and open a ticket under Support in your account: our replies stay on the ticket.
Never put your password or a verification code in a message or a ticket. Our team will never ask you for it.